
Abstraction Layer Addresses Interdependencies
Developing an embedded product is a complex affair and often involves multiple teams working in parallel to achieve the common goal of shipping the product to market. It is not uncommon to find oneself in a situation where one of the teams is dependent on a critical part being delivered by another team.
For example, the HMI team might need to interface with some hardware or service that is yet to be delivered. And, even if that's not the case it is usually not practical to supply every developer with a full working hardware setup.
For these reasons, your software architecture should always provide an abstraction layer that can be used to replace external dependencies with mock implementation, as to ensure that development can always continue.
This is one of the core values we followed when developing our rapid-development solution. Any application developed using this approach is naturally guided toward an architecture that ensures that all application layers are properly abstracted and remain mockable.
By having the tools take over the daunting task of generating all of the boilerplate abstraction code, your development team is free to focus on the things that make your product unique. The fact that we generate those stable abstractions is precisely the thing that made it possible for us to automatically generate a simulator instance for every application using ICS' rapid development toolset.
Here’s how you can use it to easily mock external dependencies and remain productive.
Running the Simulator Alongside Your Application
Each application generated with the toolset comes with an additional build target called “Simulator.”
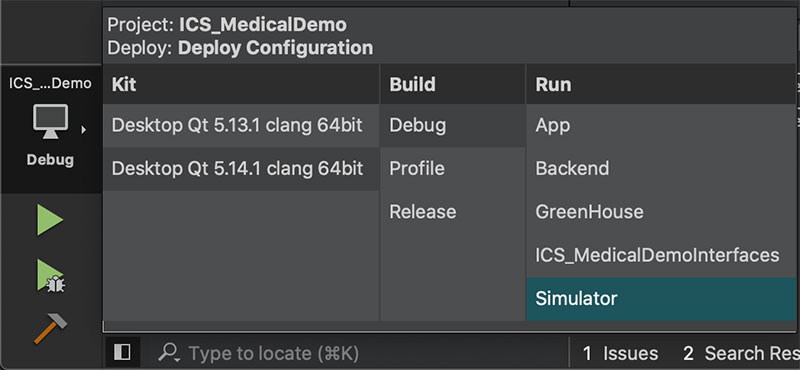
This target can be run alongside the application to provide it with a mock version of the backend and allows you to manually trigger backend events and set properties. The catch there though is that we don’t really want to have the application automatically connect to a simulator instance when deployed out in the wild so you need to make sure to pass in a “--simulator” command line argument when running your application.

(MacOS and Linux users can also use the provided “scripts/run.sh” script to automate starting a simulator instance alongside your application.)
Provided your application and simulator were started correctly, you should see the following in the bottom right corner of the simulator window:

Please give the application up to 1-2 seconds to connect to the simulator in case your application was started before the simulator was.
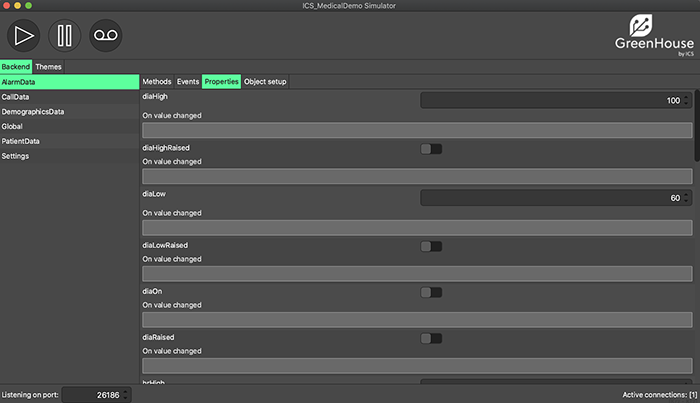
Now that the two are connected you can use the simulator’s user interface (UI) to inspect the available backend interfaces, as well as trigger events, alter their property values, and see the changes reflected in your application’s UI.
The simulator can also be used to record a series of interactions for future playback. This is particularly useful if you want to provide reproduction steps for a bug, etc.
Using Scripts to Provide a Mock Backend
You probably noticed there’s a fair sprinkling of input boxes under every method and property instance, for example:


Those input boxes can be used to insert JavaScript code to be executed whenever the property value is changed or a method is called. This means that you no longer have to jump into C++ to provide mock implementations but can instead use JavaScript for that purpose.
So, in our example providing a mock implementation for the method used to decrement the “Diastolic blood pressure high,” the alarm value would looks something like this:
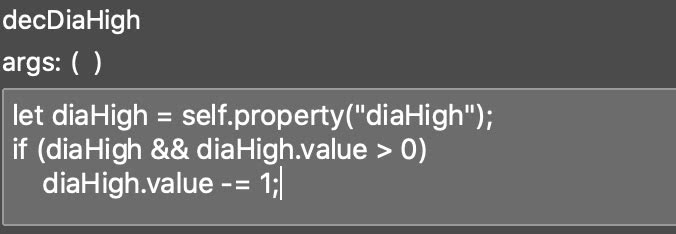
No C++/recompilation or application restart required! And don’t worry the generated simulator code comes with documentation of all the functionality exposed via the scripting API.
You will also find that the simulator will store for future use all the scripts you write so you don’t have to enter them every time you run it. In fact, the simulator project file comes equipped with means to automatically deploy scripts found in the “simScripts” folder, making it simple to share your backend mock scripts among the members of your team.
This means you can now use the simulator to mock all of the backend functionality that would otherwise block your progress.
You can also rest assured that if the functionality becomes available, your application will actually prefer calling the real implementation that has been provided to the application. Thus, there’s no need to worry about cleaning up scripts that might still be useful to team members without access to the necessary hardware etc.
The Takeaway
Don’t let development get derailed by complex interdependencies. Make sure your software architecture provides an abstraction layer that can be used to replace external dependencies with mock implementation. Doing so ensures that development can continue unimpeded and your project can move forward.
For more information, check out A Smarter Way to Build Embedded Touch Devices.