
How to Use FreeRTOS on a Variety of Platforms
In this third installment of the blog series on FreeRTOS, we'll look at some sample code and I'll present some ways you can get started on various platforms. And if you're enjoying this series, be sure to register for our live webinar An Introduction to FreeRTOS, which will run Thursday, February 11 at 1 pm EST.
Code Example (Arduino)
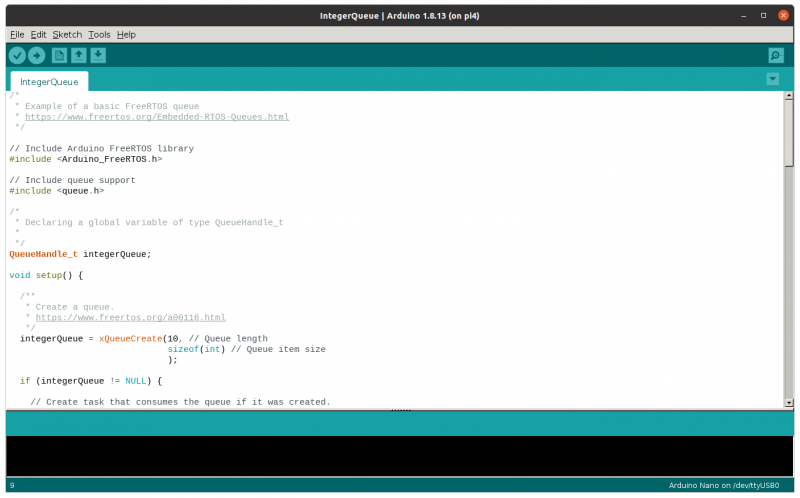
The following is a simple but complete C++ program taken from the FreeRTOS Arduino examples that uses the version of FreeRTOS for the popular Arduino microntroller platform (I'll have more to say about this later).
It runs two tasks - one to blink an on-board LED and one to read an analog input and send the result out a serial port.
Note that most of the APIs here are standard Arduino library functions.
The code declares the two FreeRTOS tasks. Note that setup() is the Arduino equivalent to a C or C++ main(). Here it initializes the serial port.
#include <Arduino_FreeRTOS.h>

// define two tasks for Blink & AnalogRead
void TaskBlink( void *pvParameters );
void TaskAnalogRead( void *pvParameters );

// the setup function runs once when you press reset or power the board
void setup() {

  // initialize serial communication at 9600 bits per second:
  Serial.begin(9600);

  while (!Serial) {
    ; // wait for serial port to connect. Needed for native USB, on LEONARDO, MICRO, YUN, and other 32u4 based boards.
  }
We then create two FreeRTOS tasks, something that would be more difficult to do if using the standard bare metal Arduino code. There are a number of parameters to specify, such as stack size and priority, that you can look up in the FreeRTOS documentation.
  // Now set up two tasks to run independently.
  xTaskCreate(
    TaskBlink
    ,  "Blink"   // A name just for humans
    ,  128  // This stack size can be checked & adjusted by reading the Stack Highwater
    ,  NULL
    ,  2  // Priority, with 3 (configMAX_PRIORITIES - 1) being the highest, and 0 being the lowest.
    ,  NULL );

  xTaskCreate(
    TaskAnalogRead
    ,  "AnalogRead"
    ,  128  // Stack size
    ,  NULL
    ,  1  // Priority
    ,  NULL );

  // Now the task scheduler, which takes over control of scheduling individual tasks, is automatically started.
}
loop() is a standard Arduino function which is called repeatedly by setup(). We don’t use it here but it is required since it gets called by setup().
void loop()
{
  // Empty. Things are done in Tasks.
}
Now the implementation of the two tasks. TaskBlink is the task which blinks an LED by driving an output pin high and low every second. It uses standard Arduino functions to do this.
void TaskBlink(void *pvParameters)  // This is a task.
{
  (void) pvParameters;

/*
  Blink
  Turns on an LED on for one second, then off for one second, repeatedly.
*/

  // initialize digital LED_BUILTIN on pin 13 as an output.
  pinMode(LED_BUILTIN, OUTPUT);

  for (;;) // A Task shall never return or exit.
  {
    digitalWrite(LED_BUILTIN, HIGH);   // turn the LED on (HIGH is the voltage level)
    vTaskDelay( 1000 / portTICK_PERIOD_MS ); // wait for one second
    digitalWrite(LED_BUILTIN, LOW);    // turn the LED off by making the voltage LOW
    vTaskDelay( 1000 / portTICK_PERIOD_MS ); // wait for one second
  }
}
The other task reads an analog input and sends the result out a serial port:
void TaskAnalogRead(void *pvParameters)  // This is a task.
{
  (void) pvParameters;

/*
  Reads an analog input on pin 0, prints the result to the serial monitor.
*/

  for (;;)
  {
    // read the input on analog pin 0:
    int sensorValue = analogRead(A0);
    // print out the value you read:
    Serial.println(sensorValue);
    vTaskDelay(1);  // one tick delay (15ms) in between reads for stability
  }
}
The FreeRTOS version for Arduino comes with a number of examples, some of which are more complex and use more RTOS features like queues.
Getting Started - Linux Port/Simulator
If you don't yet have any microcontroller hardware, there is a port to Linux that provides an environment to experiment with FreeRTOS and develop FreeRTOS applications intended for later porting to real embedded hardware.
It uses uses Linux's POSIX threading to support running tasks as threads although the application will not exhibit true real-time behavior.
For more details see this link.
I tried this on an Ubuntu Linux desktop system and had no trouble building it from source and running a demonstration application.
Getting Started - Windows Port/Simulator
Similar to the Linux port, there is a version that runs on Windows that you can use to write and run FreeRTOS code for experimental purposes on a deskop. It uses the Windows scheduler for each FreeRTOS task. It has support for the MinGW and Visual Studio compilers and the Eclipse IDE.
See this link to get the details.
Getting Started - Arduino
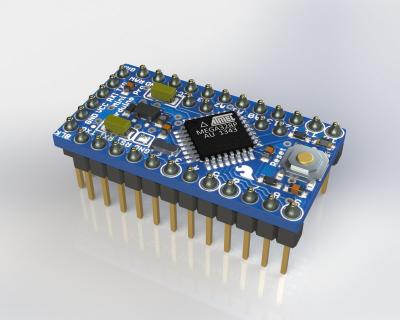
Earlier I showed a code example that used the port of FreeRTOS to the Arduino platform. Arduino is a family of low-cost microcontrollers mostly aimed at hobbyists and non-professional programmers. FreeRTOS is available directly from the Arduino IDE and includes a number of example programs.
I found it very easy to get the examples to run on a low cost (approximately US$5) Arduino Pro Mini that I had on hand.
While this is probably not the best platform for serious development, if you already have an Arduino around it is a good way to try it out.
Getting Started - NXP i.MX RT1050 Evaluation Kit
There are many low cost microcontroller evaluation boards on the market that support FreeRTOS. One example is the NXP i.MX RT1050 evaluation kit for the i.MX RT1050 Crossover MCU with Arm Cortex-M7 core.
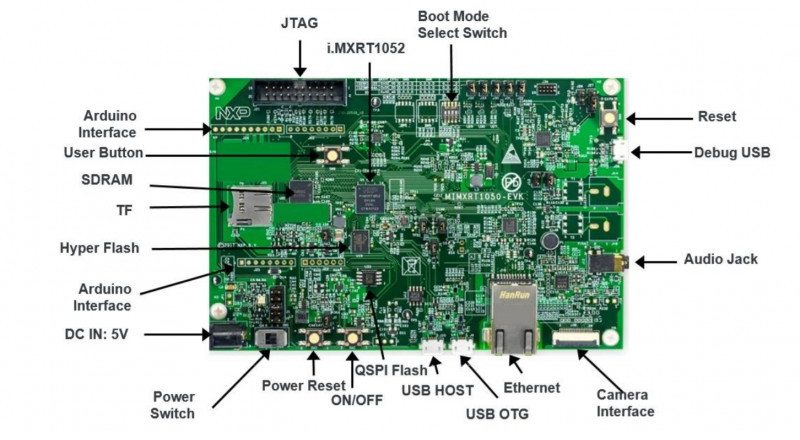
Key features include:
- 256 Mb SDRAM memory, 512 Mb Hyper Flash, 64 Mb QSPI Flash, socket for SD card
- Small LCD display/touchscreen
- Six axis sensors, audio in/out, Ethernet, CAN bus
- IDE is MCUXpresso (based on Eclipse)
- Supports FreeRTOS, Zephyr OS, ARM MBed OS, bare metal
- About US$100 with display
This is also one of the boards currently supported by Qt for Microcontrollers, supporting the on-board LCD display and touchscreen.
I found it quite easy to get this board up and running with the vendor supplied MXUXpresso IDE and the included FreeRTOS examples.

Summary
Embedded system designs today are increasingly using microcontrollers, in some cases even using them to drive a user interface. Knowing how to develop for these platforms is a job skill that is very much in demand.
Of the many available RTOS options, FreeRTOS is one of the most popular due to its low cost, large feature set, scalability, and documentation. This three-part blog series has only scratched the surface of what FreeRTOS can do but I hope I have given you a better appreciation of its capabilities and maybe even motivated you to try it out.
References
Here are some useful links on FreeRTOS. The extensive documentation includes a full 400-page book that is freely downloadable as a PDF.