The Qt Graphical Effects Module
Introduction
This blog posting gives an introduction to the Qt Graphical Effects module which is available in Qt 5. As of Qt 5.1 the module offers 25 QML components which support effects in these categories: blend, color, gradient, distortion, drop shadow, blur, motion blur, glow and mask.
List of Effects
Here is the list of effects provided as of Qt 5.1:
| Effect | Description |
|---|---|
| Blend | Merges two source items by using a blend mode. |
| BrightnessContrast | Adjusts brightness and contrast. |
| ColorOverlay | Alters the colors of the source item by applying an overlay color. |
| Colorize | Sets the color in the HSL color space. |
| Desaturate | Reduces the saturation of the colors. |
| GammaAdjust | Alters the luminance of the source item. |
| HueSaturation | Alters the source item colors in the HSL color space. |
| LevelAdjust | Adjusts color levels in the RGBA color space. |
| ConicalGradient | Draws a conical gradient. |
| LinearGradient | Draws a linear gradient. |
| RadialGradient | Draws a radial gradient. |
| Displace | Moves the pixels of the source item according to the given displacement map. |
| DropShadow | Generates a colorized and blurred shadow image of the source and places it behind the original, giving the impression that source item is raised from the background. |
| InnerShadow | Generates a colorized and blurred shadow inside the source. |
| FastBlur | Applies a fast blur effect to one or more source items. |
| GaussianBlur | Applies a higher quality blur effect. |
| MaskedBlur | Applies a blur effect with a varying intensity. |
| RecursiveBlur | Blurs repeatedly, providing a strong blur effect. |
| DirectionalBlur | Applies blur effect to the specified direction. |
| RadialBlur | Applies directional blur in a circular direction around the item's center point. |
| ZoomBlur | Applies directional blur effect towards source item's center point. |
| Glow | Generates a blurred and colorized image of the source and places it behind the original, giving impression that the source is glowing. |
| RectangularGlow | Generates a blurred and colorized rectangle, which gives the impression that the source is glowing. |
| OpacityMask | Masks the source item with another item. |
| ThresholdMask | Masks the source item with another item and applies a threshold value. |
Basic Usage
To use Qt Graphical Effects start by putting the following import statement in your QML program:
import QtGraphicalEffects 1.0
To use an effect declare the desired effect component and configure it's properties. Typically the effects operate on a source image which should be hidden. The effect itself will show the image that was modified by the effect. Often it is convenient to overlay the effect on the original image.
If the effect is anchored to the source image that it operates on it needs to be either a child or a sibling of the source image.
Some effects don't need to use a source image (like the gradients) or can combine two images (like Blend).
The source items for most effects can be any QML type including a video or another effect.
The effects have a number of properties to control the generated output. As is usual with QML these properties can be controlled by animations if desired.
The effects are implemented entirely in QML and most of them use OpenGL vertex and fragment shaders, so much of the processing is performed on the GPU. A future blog posting may go into more detail on how to use shaders from QML. There are no special platform requirements beyond OpenGL 2.0 or OpenGL ES 2.0 support which is required to run Qt Quick 2.
A Simple Example
Here is a simple example taken straight from the Qt documentation. We use a FastBlur effect to operate on an image. The source is an Image which uses a file as a source. The source image is hidden. The effect operates on the source (by referencing it's id property).
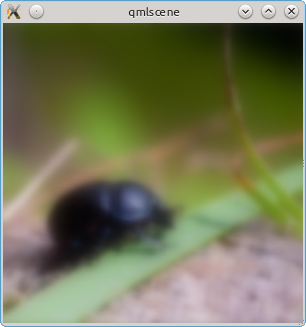
The Fastblur effect has a radius property which defines the distance in neighboring pixels over which to perform the blurring. It ranges from zero (no blurring) to an infinite value (in practice 64 pixels is about the maximum you would want to use).
Here is the example code:
import QtQuick 2.0
import QtGraphicalEffects 1.0

Item {
    width: 300
    height: 300

    Image {
        id: bug
        source: "images/bug.jpg"
        sourceSize: Qt.size(parent.width, parent.height)
        smooth: true
        visible: false
    }

    FastBlur {
        anchors.fill: bug
        source: bug
        radius: 32
    }
}
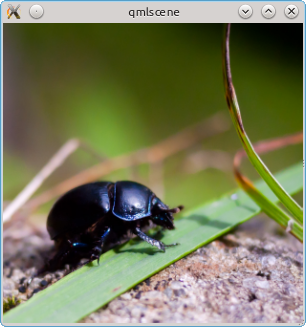
Here are screen shots of the image without and with the blur effect applied:
A More Complex Example
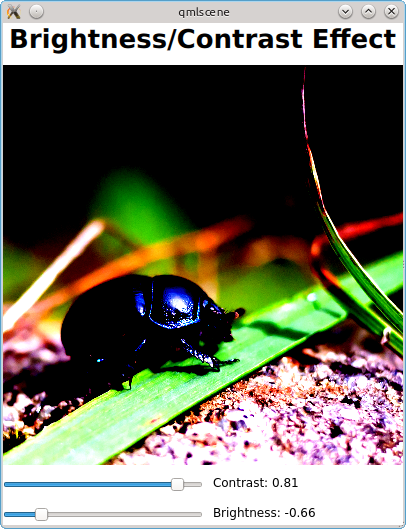
As a more interesting and complex example let's demonstrate the BrightnessContrast effect. This effect can increase or decrease the brightness and contrast of the source item.
To make it more interactive we will add some sliders to control the brightness and contrast. For this we can use the Slider element from the Qt Quick Controls (these come with Qt version 5.1.0 so you will need that version or later to run the example).
Here is the code:
import QtQuick 2.0
import QtQuick.Controls 1.0
import QtGraphicalEffects 1.0

Column {
    spacing: 10
    Text {
        anchors.horizontalCenter: parent.horizontalCenter
        font.pointSize: 20
        font.bold: true
        text: qsTr("Brightness/Contrast Effect")
    }
    Rectangle {
        width: 400
        height: 400
        Image {
            id: image
            anchors.fill: parent
            source: "images/bug.jpg"
            smooth: true
            visible: false
        }
        BrightnessContrast {
            id: effect
            anchors.fill: image
            source: image
            brightness: 0.0
            contrast: 0.0
        }
    }
    Row {
        spacing: 10
        Slider {
            id: contrastSlider
            minimumValue: -1.0
            maximumValue: 1.0
            value: 0.0
            onValueChanged: effect.contrast = value
        }
        Label {
            text: qsTr("Contrast: %1").arg(contrastSlider.value.toFixed(2))
        }
    }
    Row {
        spacing: 10
        Slider {
            id: brightnessSlider
            minimumValue: -1.0
            maximumValue: 1.0
            value: 0.0
            onValueChanged: effect.brightness = value
        }
        Label {
            text: qsTr("Brightness: %1").arg(brightnessSlider.value.toFixed(2))
        }
    }
}
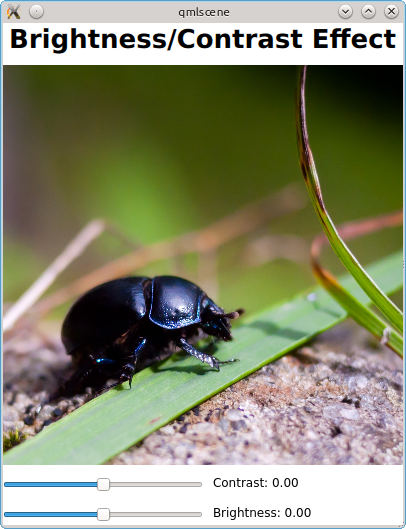
The code is quite straightforward. The interesting parts of the code related to the effect are highlighted. The effect operates on an Image which is not visible. The two sliders control the effect's contrast and brightness properties.
Here are a couple of screen shots showing the application running with different slider positions:
More Examples
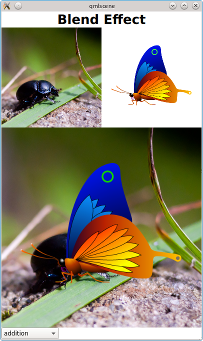
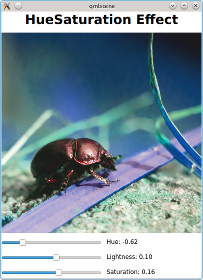
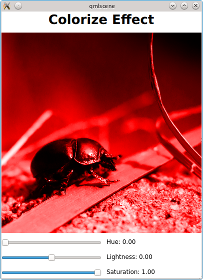
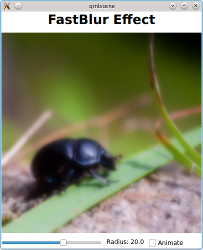
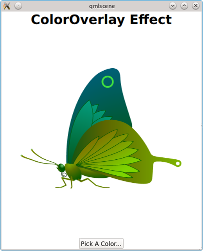
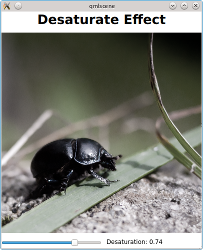
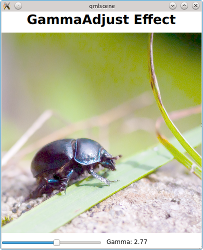
As I was writing this blog post I developed a number of examples to demonstrate more of the effects. Screen shots are shown below. The code for all of them is very similar and can be downloaded from here.
Summary
The Graphical Effects components in Qt 5 can be useful for producing different visual effects. The examples shown here are very simple. Much more can be done by combining effects and using animation.
While in some cases you might want to implement effects in C++ or using OpenGL shaders, using the QML components is much simpler if the effect you want is available.
Currently there is no C++ API; it is purely a set of QML components. There are C++ classes in QtWidgets that all derive from QGraphicsEffect: QGraphicsBlurEffect, QGraphicsColorizeEffect, QGraphicsDropShadowEffect and QGraphicsOpacityEffect. These classes can be used to implement effects on widgets and Graphics View items but are unrelated to the QML Graphical Effects module.
The details of how to use the graphics effects are all well documented in the Qt API documentation. I encourage you to try using them in your user interfaces.