
Creating QML Controls From Scratch: Switch
Continuing our QML Controls from Scratch series, this time we will implement a Switch. Switch is similar to CheckBox with the exception that it has a slidable pill (implemented with a MouseArea and drag property) and no text property. A Switch can be toggled either by tapping or dragging.
Switch.qml
import QtQuick 2.0
Rectangle {
id: root
// public
property bool checked: false
signal clicked(bool checked); // onClicked:{root.checked = checked; print('onClicked', checked)}
// private
width: 500; height: 100 // default size
border.width: 0.05 * root.height
radius: 0.5 * root.height
color: checked? 'white': 'black' // background
opacity: enabled && !mouseArea.pressed? 1: 0.3 // disabled/pressed state
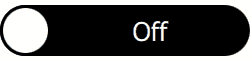
Text {
text: checked? 'On': 'Off'
color: checked? 'black': 'white'
x: (checked? 0: pill.width) + (parent.width - pill.width - width) / 2
font.pixelSize: 0.5 * root.height
anchors.verticalCenter: parent.verticalCenter
}
Rectangle { // pill
id: pill
x: checked? root.width - pill.width: 0 // binding must not be broken with imperative x = ...
width: root.height; height: width // square
border.width: parent.border.width
radius: parent.radius
}
MouseArea {
id: mouseArea
anchors.fill: parent
drag {
target: pill
axis: Drag.XAxis
maximumX: root.width - pill.width
minimumX: 0
}
onReleased: { // releasing at the end of drag
if( checked && pill.x < root.width - pill.width) root.clicked(false) // right to left
if(!checked && pill.x) root.clicked(true ) // left to right
}
onClicked: root.clicked(!checked) // emit
}
}Test.qml
import QtQuick 2.0

Switch {
    property bool backend: false

    checked:   backend

    onClicked: backend = checked
}
Summary
I hope you were able to successfully create a Switch. Next time I'll show you how to create a Slider. The source code can be downloaded here. Be sure to check out my webinar on-demand. I walk you through all 17 QML controls with code examples.